Another baby (um, toddler) quilt

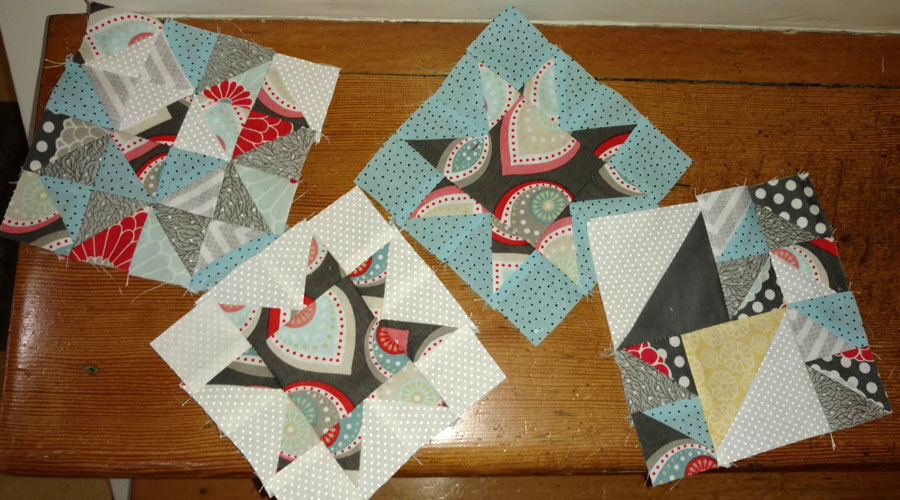
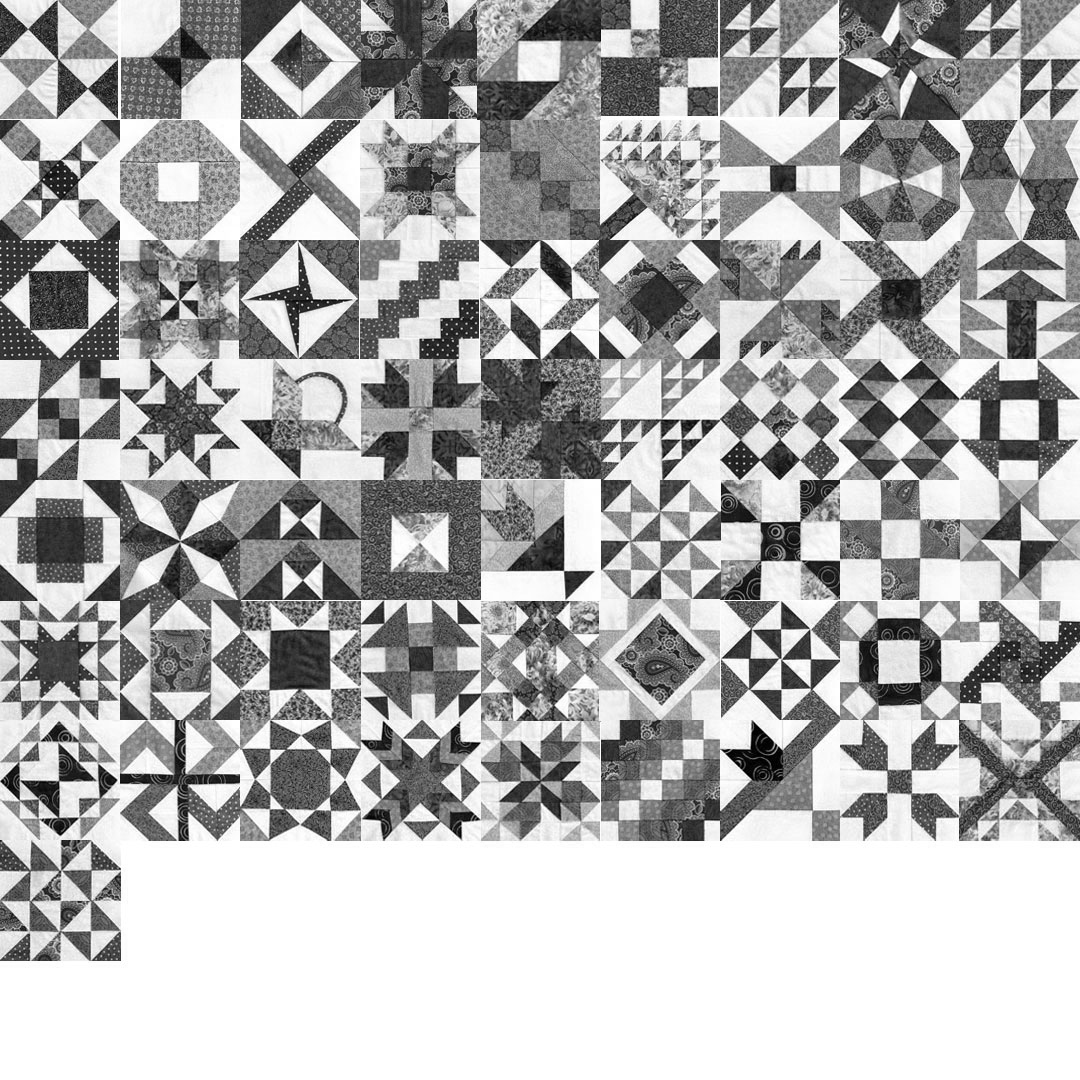
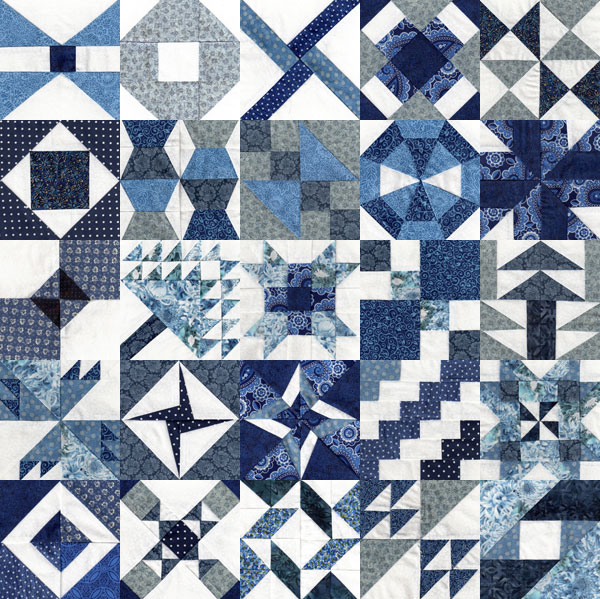
About a week and a half before Thanksgiving, I received, unexpectedly, a quilt from my sister. It is absolutely beautiful, a mixture of windmills and pinwheels, with deconstructed appliquéd pinwheels in the border, French knots and big-stitch quilting.

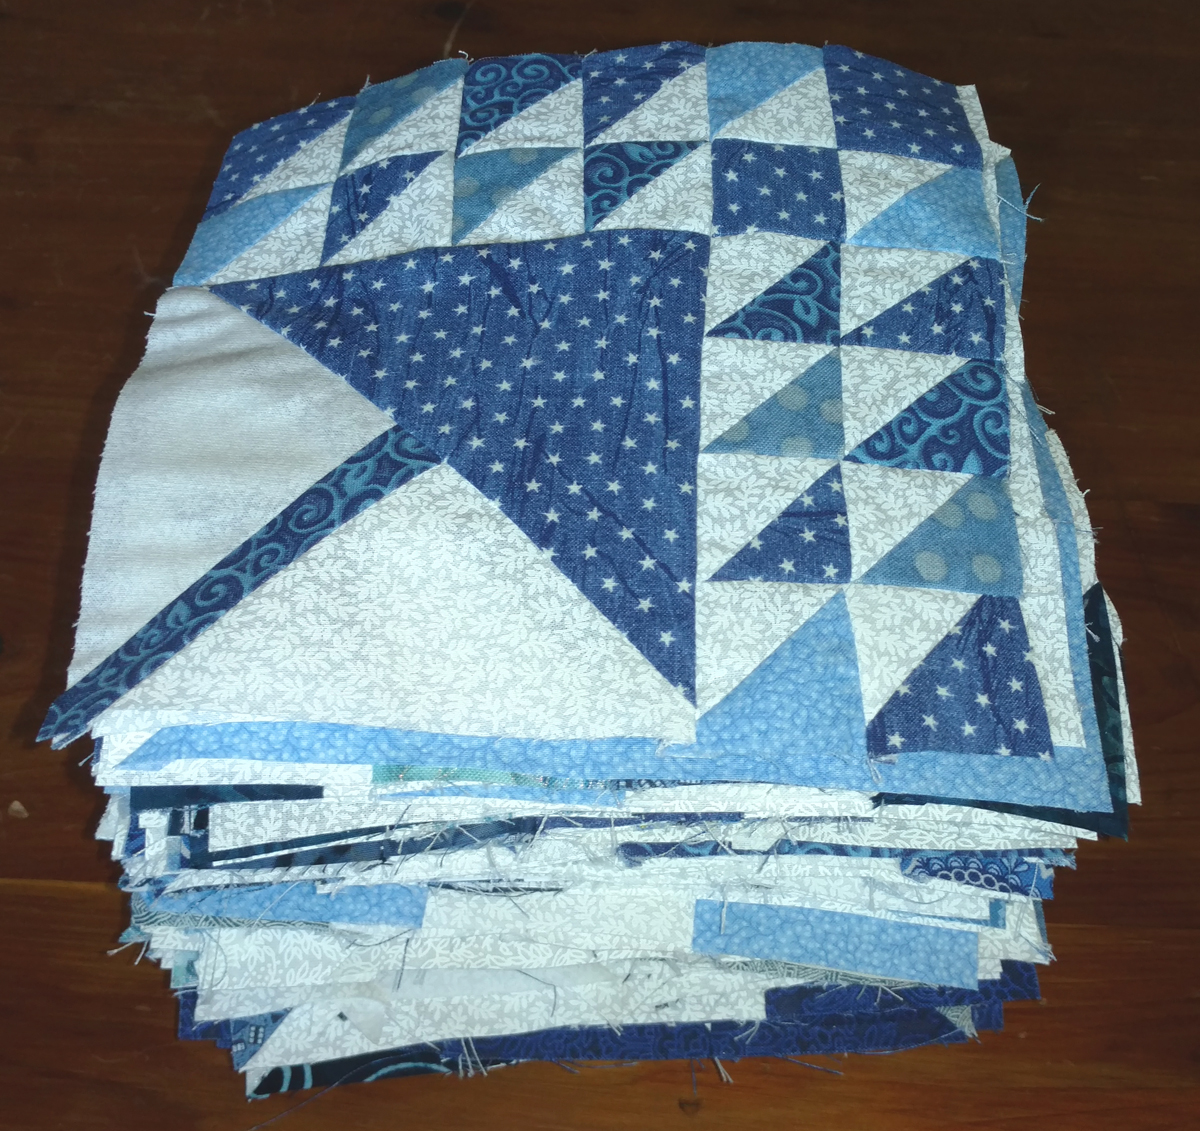
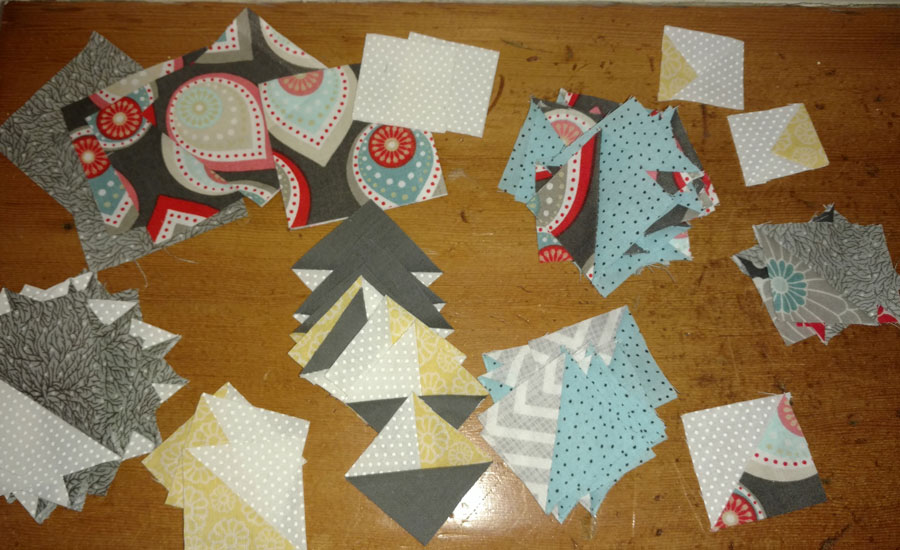
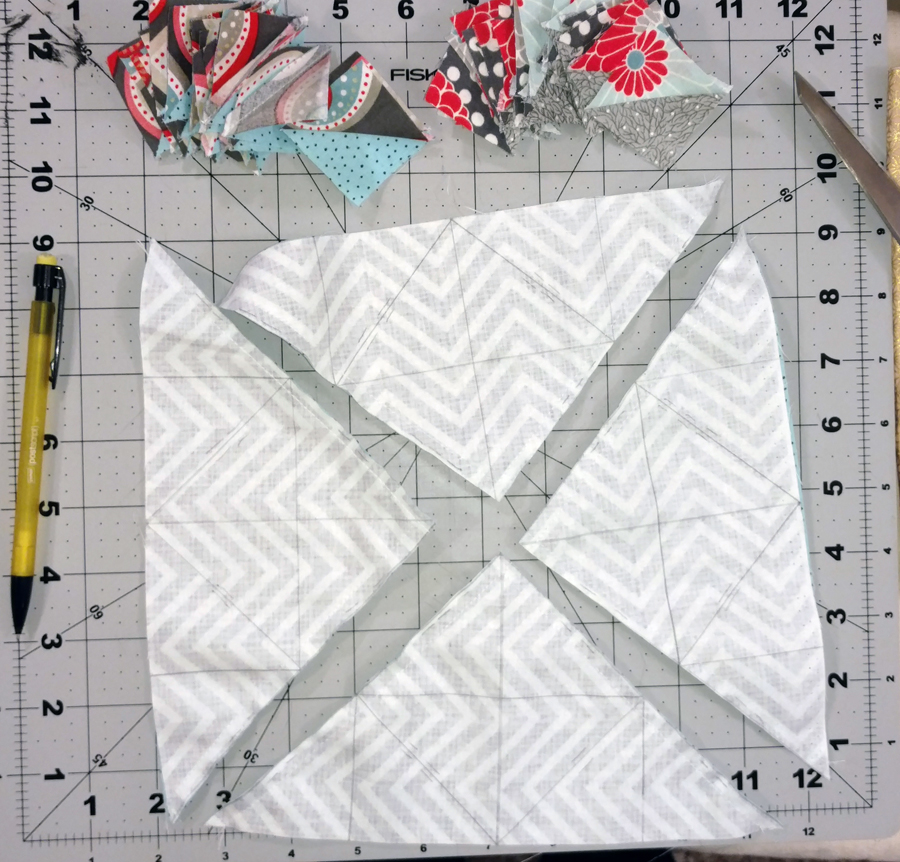
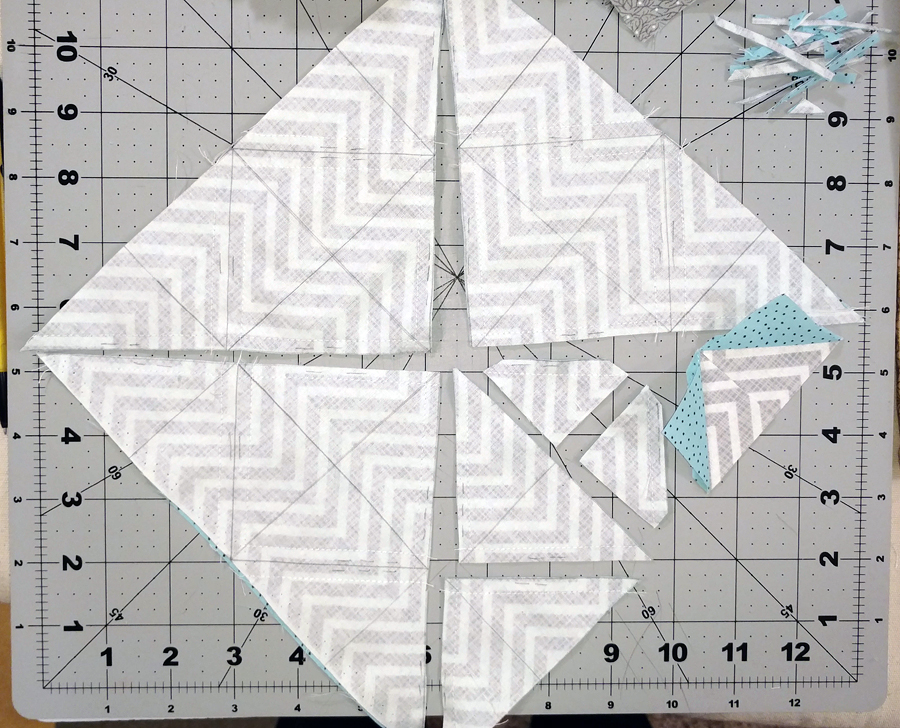
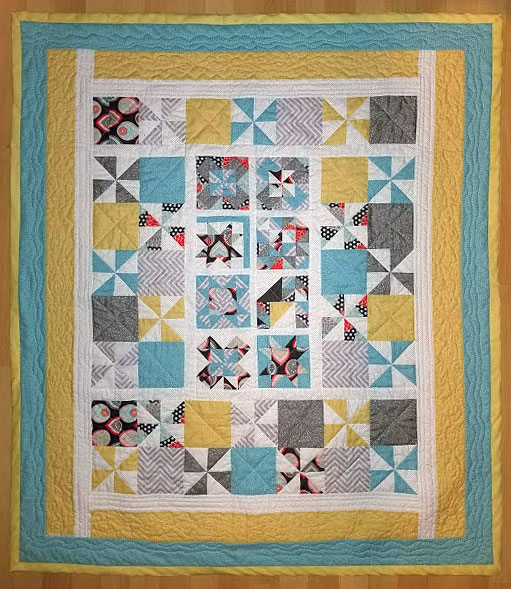
It galvanized me to finish this long-overdue baby quilt for a great-nephew. Because Wesley is now 22 months old, I had taken to calling it a toddler quilt. A week and a half before Thanksgiving, I had all the quilt blocks made but no plan. No matter. I just started stitching – 1/2″ strips  to fill out a too-small square, sashing and more sashing to marry up the dimensions of my inadvertant mix of 5″ and 4.5″ squares, a couple of borders, another border to make it a little large … and so on.  And, voila! a quilt top.

Then what to do? I had all these bits of blocks that went unused on the front; I stitched those together into a couple of strips which helped fill out the width of the quilt back.

Then what next? I made a test sandwich of top-batting-bottom, looked at a tutorial or two, put on a quilting presser foot and learned how to machine-quilt for about 15 minutes. With the tiny bit of knowledge, I machine-quilted the pin-basted quilt. It went pretty well, with minimal ripping and re-stitching.

After trimming, I machine-sewed one side of the bias binding to the quilt, gathered a few airplane-approved sewing tools (needle, thread, small thread snips), and put it in my carry-on backpack for the trip to Florida. 

On the planes, at my sister-in-law’s house, in the car … I hand-stitched the other side of the bias binding. After we pulled up into the driveway of my brother-in-law’s house for Thanksgiving dinner, I took the final two (!) stitches to finish the quilt.

These photos were rather hurriedly taken on the floor of a bedroom. Not ideal, but at least I have a record.

It was a different way of working for me. Not the work-right-up-to-the-deadline method; that, unfortunately, is common. I mean the idea of taking what I have and organically building up and out, rather than planning it out all in advance, making a model, do a trial run, and then, at long last, making the final thing. I like it.

Farmer’s Wife quilt blocks – completed!

All 111 blocks!!
All 111 blocks!!

Well, folks, it’s a milestone for the Farmer’s Wife quilt I’ve been working on: A few days ago, I finished the last of the 111 blocks!

My sister and I have been making Farmer’s Wife quilt squares since January 2015. She has been drafting templates and instructions each week on her blog, Handmade Karma, and we’ve each been sewing the blocks on our own. As each week is completed Mary Jo has posted our scans of our blocks side by side. Shown below, and on her blog, is the final week, week 39:

2016-09-02-Farmers-Wife-week-39

I chose to use only blue and white fabrics so that all I had to deal with is value. Mary Jo jewel tones and an off-white. It’s been so interesting to see our squares side by side. I’m looking forward to putting the squares together with narrow white sashing and small navy intersectional squares.

Yes, I’m still lettering and making books. I’ve been working to complete this “edition” of manuscript books and I’ve got another one in the works. Also, prints, stationery, bookmarks … More on that soon.

More of the baby quilt

The quilt, in bits and pieces

I’ve had a little time to work some more on this baby quilt, which is now quite behind the times. At this point I’m more tardy than the baby was premature! Still, I have hopes of finishing it in short order.

After several false starts, I decided to make an organically built scrap quilt, from squares and half-square triangles exclusively. I made a ton of half-square triangles with finished size of 1 inch. (See my earlier post about that.) At that I stepped back in horror and wondered what possessed me to work at a 1-inch scale. So I made some half-square triangles and squares at double size (a whopping 2 inches, for those who are mathematically challenged). And then I started putting them together as seemed pleasing. I’ve got seven squares together now, and the makings of probably another five squares right there on the top step of the stairs that lead up from the basement sewing room. If that doesn’t seem enough, I’ll continue making more pieces, or maybe just have some blank squares interspersed.

It’s very unusual for me to begin with only a cellular plan and no overall plan.

I’m liking it.

2016-03-23-baby-quilt-3-squares2016-03-23-baby-quilt-4-squares2016-03-23-baby-quilt-cut-pieces

Another quilting post

In between teaching a manuscript book class, some web design work, and my daily alphabets, I’ve been doing some quilting … on the Farmer’s Wife quilt-along (link to this week’s squares) with my sister, but also on a baby quilt.

Cutting a 9-inch square.

After some false starts, I’ve decided to take a grassroots approach to it, starting with the unit — the half-square triangle (HST) —and building up. I started with one 9-inch square of fabric. Two 9-inch squares sandwiched together, sewn and cut apart yield 32 HSTs. Here I’ve just cut the top and right edges. Then I rotated the cut piece of fabric and cut the other two sides.

2016-03-07 HST pic 2 9-in square markedNext I marked the sewing and cutting lines. I will sew 1/4″ away from either side of each diagonal line and then cut on the line, while all straighten lines will be just cut. It’s hard to keep track of which lines are sewn next to and which are not, so I’ve learned to mark indicated the sewing lines with a couple of additional dotted lines within each section of the diagonal lines. You can see them more clearly if you click on the thumbnail at left. This image shows all of the diagonal lines — the primary X and the secondary diagonals that form a diamond — and the primary straight lines that form a cross. But this image doesn’t show the secondary straight lines that would intersect the four X’s.

The primary diagonal sewing lines, sewn and cut.

Here I’ve sewn on the primary diagonal lines and then cut on the lines. (And you can now see the secondary straight lines in this image.) Next, I’ll sew on the secondary diagonal lines, then cut them apart, then cut on all the cut-only lines. Now I have 32 folded triangles. The left image below shows one quarter of the 9-inch square partially cut part, and one pair of HSTs ironed open. The next image show three pairs of HSTs ironed open.

2016-03-07 HST pic 7 cut and ironed 1

2016-03-07 HST pic 7 cut and ironed 3


I’ve done this with four 9-inch square sandwiches, each a different fabric pairing, yielding 144 HSTs total. You can see two sets of these HSTs in the photo above right. These will finish at 1 inch square, which is small. But let’s see: 32 inches x 32 inches means that already the quilt is nearly 3 feet square. I’ll do some more HSTs to finish at double the size, 2 inches square. I’ll start with 6.5-inch squares, but only make the primary X and cross, to yield 16 HSTs about 3 inches square, trim to 2-1/2 inches square, for a finished size of 2 inches square.

Then we’ll see how they might fit together.

Farmer’s Wife quilt — values

Talking with my sister about yesterday’s blog post, I said that it’s clear that I need more light blue. Then I clarified that I need more full-hue light blue, and that I have plenty of low-hue light blue. I just confirmed that when I de-saturated the image:

Farmer's Wife quilt so far -- in black and white to check value distribution
Farmer’s Wife quilt so far — in black and white to check value distribution

Progress on the Farmer’s Wife quilt

We’ve been traveling a good deal lately, and the calligraphy that I have done has mostly consisted of private commissions, so I don’t have much to show right now.

But my Farmer’s Wife sampler quilt is coming along. Back in April, I mentioned the quilt-along that my sister and I embarked on at the beginning of the year. The quilt consists of 111 unique blocks. This image shows, in chronological order of construction, all the blocks I’ve completed so far. At 64 blocks, we are more than halfway there!

Farmer's Wife quilt blocks completed so far
Farmer’s Wife quilt blocks completed so far


Farmer’s Wife quilt – progress so far

2015-04-04 Farmer's-Wife-the-first-25I’ve been making a Farmer’s Wife quilt, a sampler quilt consisting of 111 unique blocks. Since the beginning of the year, my sister has been posting tutorials, templates, and settings on two or three Farmer’s Wife blocks each week on her blog, Handmade Karma, and I’ve been trying to keep up — with variable success. Upon finishing the last block of week 10 this morning, I now have 25 blocks completed to date. (Click on the image to see it full size.)

This image was a quick little exercise in Photoshop: Scripts > Image Processor > Resize to Fit all my scans to 120 px square, set up a 600 x 900 px image with vertical and horizontal guidelines at 120 px intervals, open all the small files and drop them onto the grid. Can a Photoshop document have 111 layers? A quick google answers that question: the maximum number of layers in Photoshop is … 8,000. Wow. Who would do that?

Shown here are the 25 blocks, in no particular order. I can see that at the end of the block-making part of this quilt, I will be spending a good deal of time figuring out block order. And what to do about sashing? Not to worry: those decisions are for the future.

Meanwhile, I’ve been examining optional settings on this Pinterest board, and my sister has been pinning our squares to her Pinterest board here.